
14 Sep How Do I Stop My Bicycle Brakes from Squeaking?
Last spring, I joined a Saturday group ride through my local hills. Every time I squeezed the brakes, my bike screamed like a startled cat. Riders turned around. Some smiled. One even asked if my bike was “singing.” I felt embarrassed, so I went home and studied every cause of brake squeak. In this guide, I share what worked for me. You will learn why brakes squeak, how to fix each cause, and when to replace worn parts. Therefore, grab a few basic tools and let’s silence that noise for good.
Why Do Your Bicycle Brakes Squeak?
Brake squeak is not random noise. In fact, it is vibration. Engineers call it “stick-slip.” The pad grabs the rim or rotor, slips, then grabs again very fast. This rapid shaking creates the high-pitched sound you hear. Additionally, several common problems make this vibration worse:
- Dirt, oil, or grease on the rim or rotor
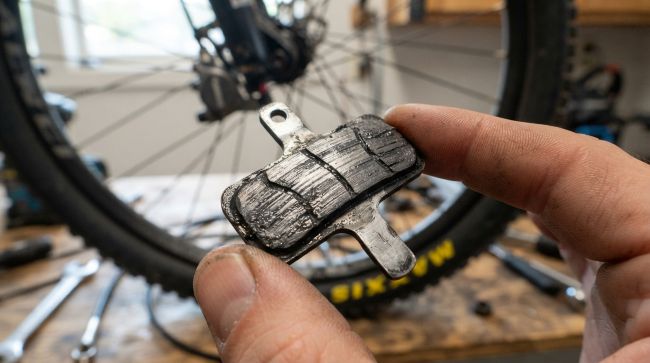
- Brake pads worn past their safe limit
- Pads set at the wrong angle against the rim
- A loose or misaligned disc brake caliper
- Glazed pads hardened by heat
- Loose bolts somewhere in the brake system
Wet weather also plays a role. Water changes friction for the first few stops. Meanwhile, contaminated pads are the worst offenders. One drop of chain oil can ruin them. More than 50 million Americans ride a bike each year, says the Outdoor Industry Association. So squeaky brakes are clearly a widespread problem. However, the good news is simple. Almost every cause above can be fixed at home in under an hour.
Start With a Clean Rim or Rotor
Dirty braking surfaces cause most squeaks, so cleaning comes first. For rim brakes, wipe the rim with a clean rag. Use isopropyl alcohol, not household cleaners. Many sprays leave a soapy film, and that film attracts more grime. For disc brakes, clean the rotor the same way. Hold it with a rag, wipe both faces, and spin the wheel as you go.
Moreover, check your pads while the wheel is out. Look for tiny bits of metal or glass stuck in the pad face. Pick them out with a sharp pick. Then lightly sand the pad with fine sandpaper. This removes the shiny, glazed layer that causes squeal. Park Tool, the leading bike repair authority, recommends isopropyl alcohol for this job. It cleans well and leaves no residue behind.
When I finally cleaned my rims properly, the difference shocked me. My front brake went from shrieking to near silence after one wipe. Therefore, never skip this step. It takes ten minutes, and it solves the problem more often than anything else.
Set Your Pad Angle With a Simple Toe-In
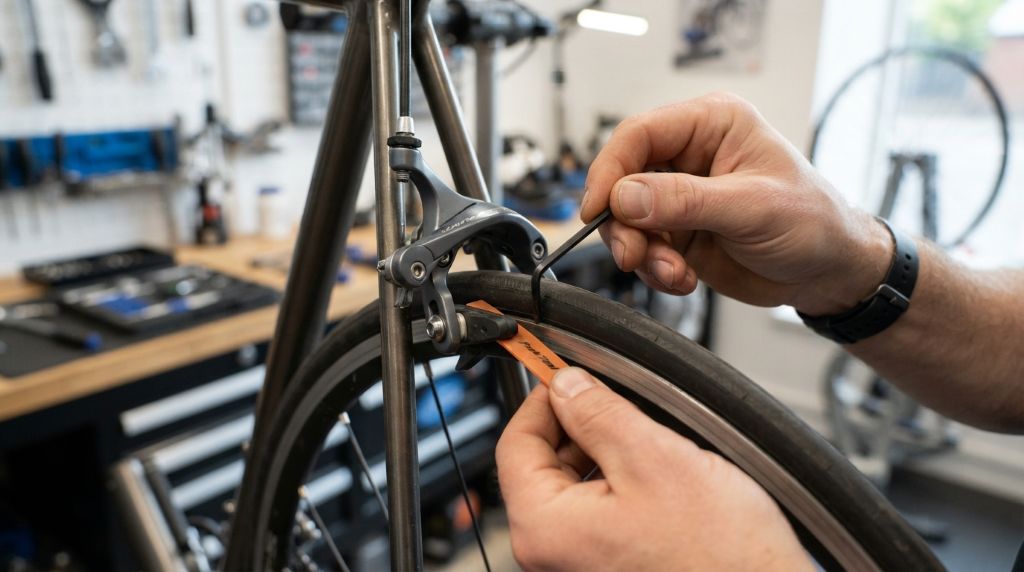
Rim brake pads must strike the rim at a slight angle. Mechanics call this “toe-in.” The front edge of the pad should touch the rim first. This small angle stops the vibration that causes squeak. Without it, the whole pad slaps the rim at once. That slap is exactly what you hear.
Follow these steps:
- Loosen the pad bolt slightly.
- Slide a folded business card behind the rear edge of the pad.
- Squeeze the brake lever and hold it.
- Tighten the bolt while the pad stays pressed.
- Remove the card and spin the wheel.
For disc brakes, alignment means the caliper itself. Loosen the caliper bolts, squeeze the lever, and retighten the bolts. This centers the caliper over the rotor. Additionally, spin the wheel afterward and listen closely. A light rub means the caliper sits off-center, so repeat the process.
I ignored toe-in for years. My old hybrid bike squealed through two full summers. One afternoon with a business card fixed what months of frustration had not. Therefore, do not overlook this five-minute job.
Break In New Brake Pads the Right Way
Fresh pads squeak because their surfaces have not matched yet. The pad and the rim or rotor must wear into each other. Mechanics call this “bedding in.” Shimano, a leading brake maker, advises a series of firm stops from moderate speed. The goal is always the same. You want an even, consistent surface on the rotor or rim.
Here is a simple bedding routine:
- Find a quiet street or an empty parking lot.
- Ride at a moderate speed, around 10 to 12 mph.
- Brake firmly, but never lock the wheel.
- Slow to walking speed, then release the lever.
- Repeat 15 to 20 times without long rests.
Meanwhile, watch your lever feel. It should grow firmer with each stop. Additionally, avoid long skids during bedding. Skids overheat one spot and glaze the pad again. Let everything cool before your next ride. After proper bedding, most new-pad squeak disappears within one session. My own disc brakes went quiet after exactly this routine, and they have stayed quiet ever since.
Get Rid of Oil and Grease Contamination
Contamination deserves its own section because it is so common. Chain lube, frame polish, and road grime all travel onto braking surfaces. Even a fingerprint on a rotor can cause noise. Signs of contaminated pads include squeal, weak stopping power, and a spongy lever feel.
Handle it like this:
- Remove the wheel and wipe the rim or rotor with alcohol.
- Sand disc pads lightly, then wipe them with alcohol.
- Sand rim pad faces flat and pick out embedded grit.
- Replace the pads if the noise or weak bite remains.
Never spray WD-40 or any lubricant near your brakes. Furthermore, be careful when you lube your chain. Apply drops one at a time while pedaling backward. Then wipe off the extra lube with a rag. Prevention beats cleaning every time.
Once, I over-lubed my chain before a rainy ride. The fling hit my rotor, and my brakes barely slowed me at the first downhill. That scare taught me to shield the rotor with a rag during chain work. Please learn from my mistake.
Know When to Replace Worn Brake Pads
Sometimes cleaning and adjusting cannot save a pad. Worn pads squeak because their backing plates sit too close to the rim or rotor. They also lose stopping power, which puts your safety at risk.
Check your pads with this simple guide:
- Rim brake pads: replace them when the wear line disappears.
- Disc brake pads: replace them when the material is about 1 mm thick.
- Inspect both pads in each caliper, not just one.
- Check your rim for a deep hollow or concave surface.
Rim wear matters too. A badly worn rim can fail under hard braking. Most rims include a wear indicator line or dot. If the indicator is gone, replace the rim or wheel. Additionally, look for cracks near the spoke holes during every check.
My rule is simple: when in doubt, swap them out. A new set of pads costs less than a restaurant lunch and takes about fifteen minutes to fit. Therefore, replace them early and ride with confidence.
Conclusion: Quiet Brakes Are One Afternoon Away
Squeaky brakes are annoying, yet they are rarely permanent. Start with a clean rim or rotor. Next, set your pads with a slight toe-in. Bed in new pads with firm, steady stops. Keep oil away from braking surfaces, and replace worn parts on time. In short, one quiet afternoon of maintenance restores both your peace and your safety.
My once “singing” bike now stops with a soft, confident hiss. Yours can too. Have you tried these fixes, or do you have a tip of your own? Share it in the comments below, because your advice might help another rider. And if you’re preparing for longer rides, you may also want to learn how to pick a durable bike frame bag for every ride to keep your essentials secure and accessible. If this guide helped you, please share it with a cycling friend who needs it.
Frequently Asked Questions
Why do my brakes squeak more in the rain?
Water reduces friction between the pad and the rim or rotor. The pads slip and vibrate, which creates noise. The squeak usually fades once the pads dry.
Can I use WD-40 to fix squeaky bike brakes?
No. WD-40 is a lubricant, so it makes braking worse. Keep all oils and sprays away from pads, rims, and rotors.
How often should I replace my brake pads?
Check them monthly. Rim pads often last 1,000 to 3,000 miles. Disc pads wear faster in mud and hills, so replace them once the wear line is gone.
Why do brand new brake pads squeak?
New pads need to bed in. Make 15 to 20 firm stops from moderate speed. The squeak should stop once the surfaces match.
Can I clean brake pads with rubbing alcohol?
Yes. Isopropyl alcohol works safely on pads, rims, and rotors. It dries fast and leaves no residue behind.