
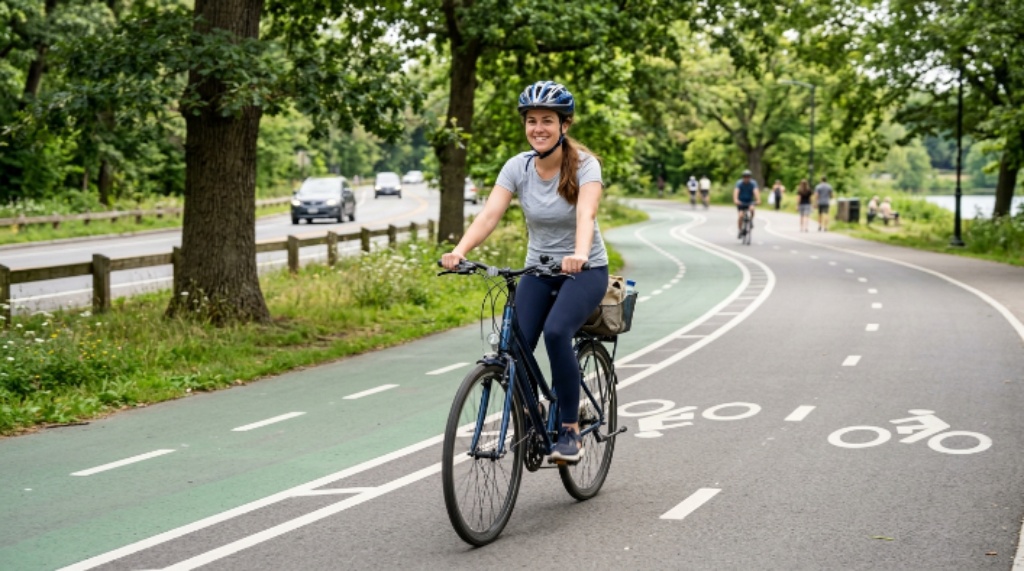
13 Aug How To Start Biking as a Beginner: A Complete Guide to Choosing Routes, Gear, and Safety
Starting to bike is simple when you build your first rides around comfort, control, and safe roads. Begin with a properly fitted bike, a helmet, a short low traffic route, and enough time to practice. More than 1,000 bicyclists die in U.S. traffic crashes each year, so smart route planning matters. Also, adults generally need at least 150 minutes of moderate activity weekly for health benefits.
Start With the Right Kind of Riding
Before buying equipment, decide what you want your bike to do. Your goals determine the bike type, route style, accessories, and riding habits that make sense.
A beginner does not need an expensive bicycle or complicated setup. You need equipment that fits your body and supports the roads you plan to ride.
Define Your First Biking Goal
Think about your main reason for riding:
- Fitness: Focus on steady rides and gradual distance increases.
- Transportation: Prioritize practical routes, visibility, and reliable equipment.
- Recreation: Look for scenic paths, parks, and quiet neighborhood roads.
- Social riding: Start with relaxed groups that welcome beginners.
- Skill building: Practice braking, shifting, turning, and road awareness.
Once you know your goal, your equipment decisions become much easier. You can also avoid spending money on features you will rarely use.
Select a Beginner Friendly Bike
The best beginner bike matches your riding environment rather than your aspirations. Consider where you will ride most often before comparing brands or advanced components.
A hybrid bike works well for many new riders because it balances comfort, efficiency, and versatility. However, other bike types can make more sense for specific riding conditions.
Understand Common Bike Types
Consider these options:
- Hybrid bike: Great for streets, paved trails, and general fitness.
- Road bike: Designed for faster pavement riding and longer distances.
- Mountain bike: Better for dirt trails, rocks, roots, and rough terrain.
- Cruiser bike: Comfortable for relaxed rides on mostly flat surfaces.
- Gravel bike: Useful for pavement, packed dirt, and mixed surface routes.
- Electric bike: Helpful when hills, distance, or fitness levels create challenges.
Avoid buying based solely on appearance or popularity. Instead, match the bicycle to your regular roads and riding habits.
Get the Frame Size Right
Correct sizing affects comfort, handling, efficiency, and confidence. A poorly sized bike can make even short rides feel unnecessarily difficult.
Visit a reputable bike shop when possible and request a basic fitting. Pay attention to your reach, saddle height, handlebar position, and standing clearance.
You should feel balanced rather than stretched across the bike. Your knees should remain slightly bent when the pedal reaches its lowest position.
Build Your Essential Gear Kit
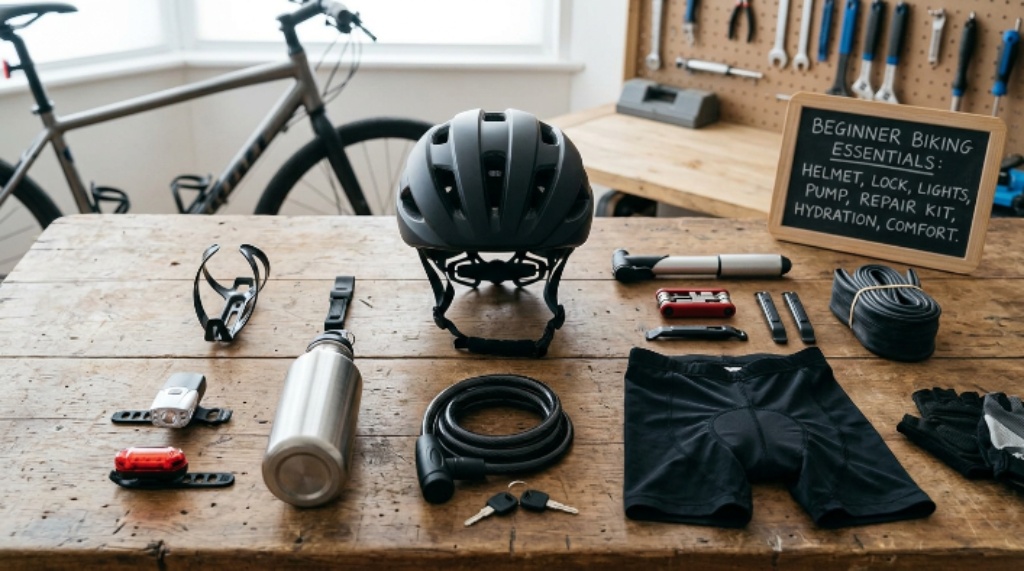
You do not need a closet full of cycling equipment before your first ride. Start with a small kit that improves safety, comfort, and basic preparedness.
Wear a Properly Fitted Helmet
A helmet should sit level and remain secure without excessive pressure. The front edge should sit above your eyebrows rather than far back on your head.
Adjust the straps so they form a comfortable, stable shape around your ears. Replace a helmet after a serious impact, even when the shell looks undamaged.
Add Lights and Reflective Gear
Use a white front light and a red rear light when riding in low light. Also, add reflective elements to your clothing, helmet, bag, or bicycle.
Visibility matters because drivers need enough time to recognize your position. Bright equipment becomes especially valuable during dawn, dusk, rain, and heavy traffic.
Carry Basic Repair Supplies
A short ride can become difficult when you suffer a simple puncture. Therefore, carry a small repair kit even when riding near home.
Your basic kit should include:
- Spare inner tube or tubeless repair supplies
- Tire levers
- Portable pump
- Multitool
- Small emergency cash or payment method
- Identification
- Phone with sufficient battery
Learn how each item works before depending on it outdoors. Practicing repairs at home removes pressure when something fails during a ride.
Dress for the Ride
You can start biking in normal athletic clothing. Choose breathable fabrics that allow unrestricted movement and avoid loose clothing near moving parts.
Cycling shorts can improve comfort during longer rides. However, they are not essential for short beginner sessions.
Plan Your First Biking Route
Route planning often matters more than distance during your first few rides. A five mile route with heavy traffic can feel harder than a ten mile route on quiet paths.
Start with roads that give you room, predictable intersections, and manageable traffic. Avoid routes that force you into complex decisions before you develop basic riding confidence.
Use a Beginner Route Formula
Build your first route around these priorities:
- Low traffic volume
- Lower speed limits
- Simple intersections
- Smooth pavement
- Few steep climbs
- Convenient places to stop
- Easy access back home
A loop route can work especially well for beginners. You can shorten it if fatigue appears earlier than expected.
Check the Route Before Leaving
Review the route using a reliable cycling navigation app. Look for bike lanes, shared paths, steep sections, construction, and difficult intersections.
Also check the weather before departure. Strong wind, thunderstorms, extreme heat, or poor visibility can turn an easy ride into an unsafe one.
Do not rely entirely on navigation technology. Learn the major roads and landmarks so you can make decisions when your phone loses service.
Learn the Core Bike Controls
Confidence comes from control, not distance. Spend your first practice session learning how the bicycle responds before attempting a long route.
Practice Braking
Find an empty parking area or quiet open space for basic practice. Start slowly and practice smooth braking with both brakes.
Avoid grabbing the brakes suddenly at high speed. Progressive braking gives you better control and reduces the chance of losing balance.
Practice stopping from several speeds. Then practice controlled stops near a chosen line or landmark.
Practice Shifting
Modern bikes often use several gears to manage different terrain. Lower gears make climbing easier, while higher gears support faster riding.
Shift before a hill becomes difficult. Smooth, early shifting reduces strain and keeps your pedaling rhythm steady.
Do not worry about finding the perfect gear. Aim for a comfortable cadence that lets you pedal without excessive force.
Practice Turning and Looking
Keep your eyes focused where you want the bicycle to travel. Looking directly at obstacles can make your steering less predictable.
Practice shoulder checks without drifting from your line. Turn your head briefly, check traffic, then return your attention forward.
Use clear hand signals when turning or changing position. However, never sacrifice control simply to signal.
Learn Basic Road Safety
Treat every road interaction as a shared responsibility. Even when traffic laws protect cyclists, drivers may not notice you immediately.
Ride predictably and maintain a steady line whenever possible. Avoid sudden movements that make your intentions difficult for others to understand.
Follow Traffic Rules
In most U.S. locations, bicyclists have specific responsibilities under state and local traffic laws. Rules can differ between jurisdictions, so check your local requirements.
At intersections, follow signals and signs that apply to bicycles. Stop when required and communicate your intentions clearly.
Ride with traffic when local law requires it. Avoid assuming that every cycling shortcut provides legal or safe access.
Manage Blind Spots
Large vehicles create serious visibility problems for cyclists. Never assume a truck or bus driver can see you simply because you can see them.
Stay away from large vehicle blind spots whenever possible. Give yourself extra space near turning vehicles and crowded intersections.
Be particularly cautious around right turning vehicles. A driver may begin turning while your paths appear separate.
Watch for Road Hazards
Small obstacles can create major problems when your tires meet them unexpectedly. Scan the road several seconds ahead instead of staring directly downward.
Watch for:
- Potholes
- Gravel
- Broken glass
- Wet leaves
- Drainage grates
- Railroad tracks
- Parked car doors
- Uneven pavement
Cross railroad tracks and similar surfaces carefully. When necessary, adjust your angle and reduce speed before crossing.
Start With Short, Manageable Rides
Your first goal should not involve reaching a specific distance. Instead, focus on finishing the ride feeling capable of riding again.
Start with roughly 20 to 30 minutes at an easy pace. Add time gradually when your body and confidence adapt.
You should still speak comfortably during most beginner rides. If you struggle to breathe while speaking, reduce your pace.
Use the Talk Test
The talk test offers a simple way to judge moderate effort. You should generally manage short conversations without excessive breathlessness.
Keep your first rides intentionally easy. A controlled pace lets you learn traffic awareness, shifting, braking, and positioning simultaneously.
Over time, increase either distance or riding time. Avoid increasing everything at once because fatigue can reduce your control.
Build a Simple Beginner Riding Routine
Consistency produces better results than occasional difficult rides. Create a schedule that fits your normal week instead of forcing an unrealistic training plan.
Try riding two or three times each week initially. Keep at least one easier day between harder or longer sessions.
A simple progression can look like this:
- Week one: Two short rides focused on control.
- Week two: Three easy rides with slightly longer duration.
- Week three: Add gentle hills or moderate distance.
- Week four: Complete one longer comfortable ride.
Adjust this progression according to your fitness and recovery. You should finish most rides feeling tired but capable rather than completely exhausted.
Maintain Your Bike
Basic maintenance prevents many avoidable problems. Check your bicycle before every ride, especially when you have not ridden recently.
Use a quick pre ride inspection:
- Tires: Check pressure and visible damage.
- Brakes: Confirm strong and even stopping.
- Chain: Check lubrication and unusual noise.
- Wheels: Look for looseness or damage.
- Seat: Confirm secure positioning.
- Handlebars: Check for movement.
- Lights: Confirm proper operation.
Learn how to inflate your tires correctly. The recommended pressure usually appears on the tire sidewall.
Clean the drivetrain when dirt accumulates. A clean and lubricated chain shifts more smoothly and reduces unnecessary wear.
Know When Not to Ride
Good cyclists know when conditions create unnecessary risk. Skipping one ride is better than forcing a dangerous outing.
Avoid riding during severe thunderstorms, flooding, dangerous winds, or visibility conditions you cannot manage. Heat also deserves attention because cycling increases fluid loss quickly.
Carry enough water for the expected duration. For longer rides, consider an electrolyte drink and a small snack.
If you feel dizzy, unusually weak, confused, or unwell, stop riding. Find a safe place to rest and arrange transportation when necessary.
Handle Common Beginner Problems
Most beginner mistakes have simple solutions when you recognize them early. Planning for these problems can prevent frustration from ending your cycling habit.
Your Saddle Feels Uncomfortable
New riders often blame the saddle immediately. However, incorrect saddle height, position, clothing, and excessive early mileage can also cause discomfort.
Adjust one factor at a time. If discomfort persists, ask a qualified bike professional to check your position.
You Feel Nervous Around Traffic
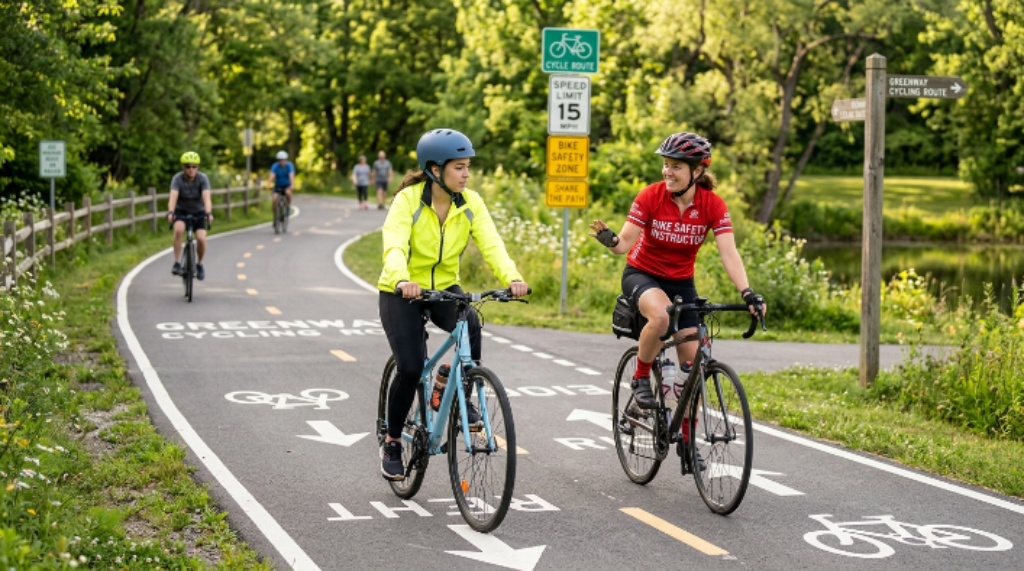
Start on quieter roads and protected paths. Gradually introduce busier streets as your handling and awareness improve.
Ride with an experienced cyclist when possible. A calm, skilled riding partner can demonstrate positioning and intersection behavior.
Hills Feel Too Difficult
Shift into an easier gear before the climb steepens. Slow down and maintain steady pedaling rather than forcing a large gear.
Walking a bicycle uphill is also acceptable. Cycling success comes from sustainable progress, not proving that every hill can be ridden.
You Keep Getting Flat Tires
Check your tire pressure regularly and inspect the tread for embedded debris. Learn proper tube replacement before your next long ride.
If flats continue, have a bike shop inspect the tire, rim, tube, and installation. Repeated punctures can indicate a mechanical issue rather than bad luck.
Make Safety Part of Your Routine
Safety works best when it becomes automatic. Build a short checklist before every ride rather than relying on memory.
Before leaving, confirm your helmet, brakes, tires, lights, phone, water, and repair kit. Then check the weather and route conditions.
During the ride, stay alert and limit distractions. Avoid using headphones in ways that prevent you from hearing nearby traffic.
After the ride, inspect your bike for new damage. A two minute check can reveal problems before your next outing.
Know When to Upgrade Your Gear
Do not upgrade equipment simply because another cyclist owns it. Upgrade when a specific problem limits comfort, safety, or performance.
For example, add better lights when you regularly ride after sunset. Consider padded cycling shorts when longer rides create persistent discomfort.
A cycling computer can help track distance and progress. However, beginners can achieve excellent results without advanced technology.
Spend money first on fit, visibility, reliable tires, lights, and maintenance tools. Those improvements usually provide more practical value than cosmetic upgrades.
FAQs
How far should a beginner bike?
Start with a comfortable 20 to 30 minute ride, then gradually increase duration as your confidence improves.
What bike should a beginner buy?
A properly fitted hybrid bike suits many beginners who plan to ride roads, neighborhoods, and paved trails.
What gear does a beginner cyclist need?
Start with a fitted helmet, lights, repair kit, water, comfortable clothing, and a phone.
Is biking difficult for beginners?
Biking becomes manageable quickly when beginners practice basic control and increase distance gradually.
How often should a beginner ride?
Two or three rides each week provide a practical starting routine for building skill and consistency.
Conclusion
Starting to bike does not require expensive equipment, advanced fitness, or long weekend adventures. Choose a suitable bicycle, learn basic controls, plan quiet routes, and build your riding time gradually. Most importantly, make safety decisions before you encounter difficult traffic or weather. Start with one short ride this week, then use each outing to improve one specific skill.