12 Jan What Can I Put on Cardboard to Make It Stronger?
Cardboard is a versatile and eco-friendly material that has many uses around the home, school, and office. From moving boxes to school projects, cardboard offers an inexpensive and customizable option for various projects and tasks. However, plain cardboard lacks sturdiness and structure. Without reinforcement, it can easily bend, tear or collapse when handled.
Luckily, there are several simple ways to reinforce cardboard to make it stronger and more durable. With a few readily available materials and some easy DIY tricks, you can transform flimsy cardboard into a sturdy material that can hold up to heavy loads and frequent handling.
Why Reinforce Cardboard?
There are several reasons why you may want to strengthen cardboard:
- To create sturdy storage and organizational boxes
- To build furniture, crafts, or other household items
- To construct temporary event displays like signs or booths
- To make durable shipping and moving boxes
- For school projects and science experiments
- To add support to cardboard furniture or playhouses
Reinforced cardboard is great for anything that needs to be lightweight yet strong. Discover how to harden cardboard with a few simple techniques, and plain old cardboard can be made much more structural and functional.
How to Make Cardboard Stronger
Use Adhesives
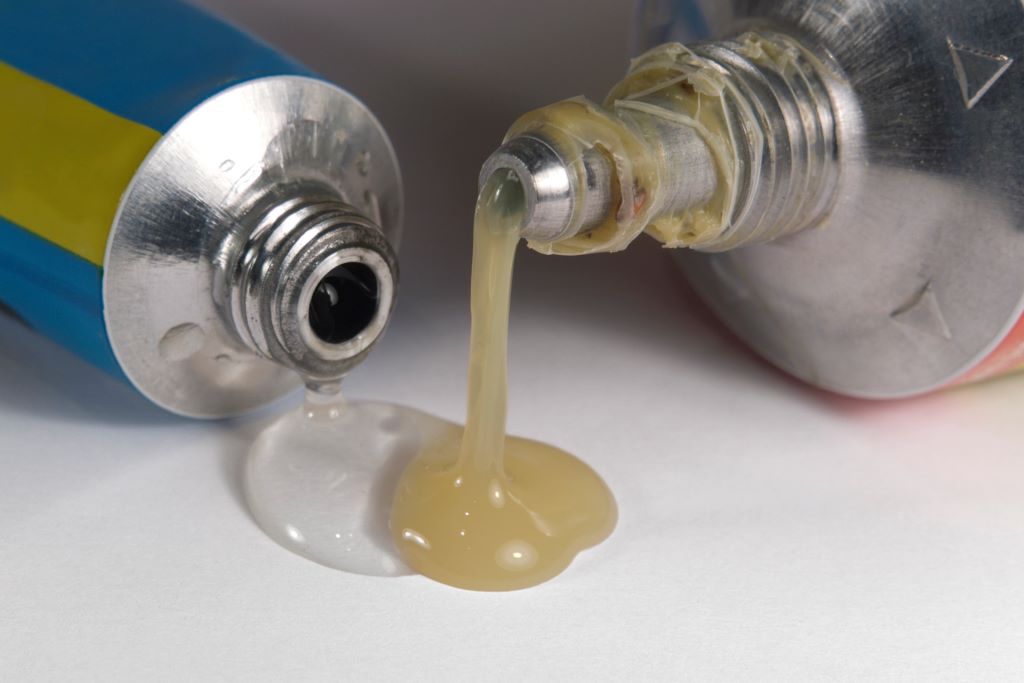
One of the easiest ways to make cardboard stronger is by using adhesives and glues. These help bind the internal fibers together, making the cardboard more rigid and cohesive.
White Glue or PVA Glue – This common household adhesive soaks into the cardboard quickly and dries transparent and rigid. White school glue or Elmer’s glue work well for most cardboard projects.
Super Glue or Epoxy – For a stronger bond and quicker drying time, use cyanoacrylate super glue or a two-part epoxy. These dry rapidly and form an incredibly hard bond. They work well on heavy boxes or furniture.
Spray Adhesive – Aerosol spray adhesives are useful for large surfaces. The spray ensures an even coat and gets into all the crevices. Look for permanent multipurpose sprays.
Mod Podge or Decoupage Glue – These mixed-media glues can seal and strengthen cardboard surfaces. They dry clear and add a glossy finish.
Use Heat
You can temporarily strengthen cardboard using heat from a hairdryer or heat gun. The heat softens the internal fibers and binders in the cardboard, allowing the material to be molded into new shapes.
Here are some heat techniques for rigidifying cardboard:
- Bend corrugated cardboard gently while heating to form 90 degree angles for stable corners on boxes.
- Heat areas on bending cardboard to flatten and straighten it.
- Heat folded areas while pressing down to make crisp creases.
- Heat cardboard while pressing between two books or boards to flatten and smooth it.
Keep in mind that heat-treated cardboard will eventually relax and lose its structure over time. For more permanent applications, use adhesives or other reinforcements.
Apply Duct Tape
Duct tape is one of the handiest materials for reinforcing cardboard. The thick fabric backing combined with the strong adhesive provides stability and structure.
To add support with duct tape:
- Fully tape over flaps and seams on boxes. The fabric mesh prevents tears.
- Cover bends and high-stress areas like edges and corners. These are weak points on cardboard shapes.
- Create improvised hinges by taping along folded creases.
- Wrap duct tape around cylindrical tubes to add hoop strength.
- Adhere strips of duct tape like ribs to strengthen flat panels.
For the best results, use high-quality cloth duct tape over the plastic variety.
Use Tyvek Tape
Similar to duct tape, Tyvek tape provides reinforced strength through its durable bonded backing and thick acrylic adhesive. It bonds extremely well to cardboard and other materials.
Some tips for improving cardboard with Tyvek tape:
- Fully wrap boxes in overlapping layers of tape for a rigid shell.
- Create handles by taping handholds cut from cardboard.
- Assemble cardboard pieces into frames or connectors by taping joints.
- Waterproof cardboard by fully encasing it in a “skin” of tape.
Tyvek tape does not leave a sticky residue and is resistant to moisture, abrasion, and UV rays. It’s great for projects that need to withstand the elements.
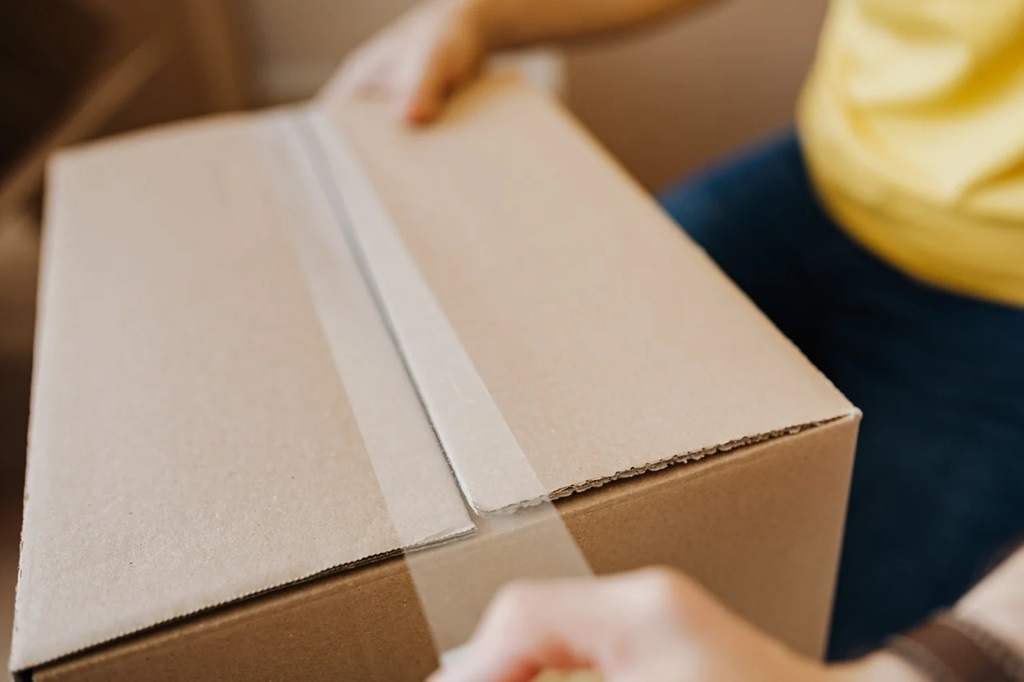
Apply Packing Tape
Regular clear packing tape may seem flimsy, but multiple layers can transform cardboard. The adhesive soaks deep into the cardboard fibers, adding rigidity.
To stiffen cardboard with packing tape:
- Fully seal box seams inside and out with overlapping tape.
- Layer tape onto flat panels like an exoskeleton for rigid sheets.
- Create instant laminate by adhering pieces with packing tape and sandwiching them together.
- Wrap tape around cylindrical forms like wrapping paper tubes to add hoop strength.
For maximum durability, apply at least 2-3 layers of tape to each area.
Use Epoxy Resin
Applying a coating of epoxy resin takes cardboard to the next level of strength and glossy beauty. The two-part resin soaks in and then cures into an incredibly hard, durable plastic shell.
Follow these tips when using epoxy resin on cardboard:
- Seal porous cardboard first with primer, PVA glue, or varnish so the resin does not soak through.
- Mix and apply the epoxy according to package directions.
- Spread or brush on 1/8 to 1/4 inch of resin over the surface.
- Let the epoxy fully cure for 24 hours before handling.
The resin surface protects from moisture and stands up to heavy use. Use resin to create sleek, modern cardboard furniture or glossy bar counters.
Add Braces
For large cardboard pieces like furniture and structures, bracing helps reinforce the shape and form. Internal braces prevent sagging, bowing, and other deformities under load.
Ideal materials to use as bracing include:
- Wood strips glued or screwed in place.
- Corrugated cardboard triangles or blocks.
- PVC pipes or rectangular tubing.
- Dowels, rods, or rolled cardboard inside tubes.
- Metal pipes, brackets, or bars.
Position bracing on the underside or interior areas that need support. Use adhesives or hardware to affix braces firmly in position.
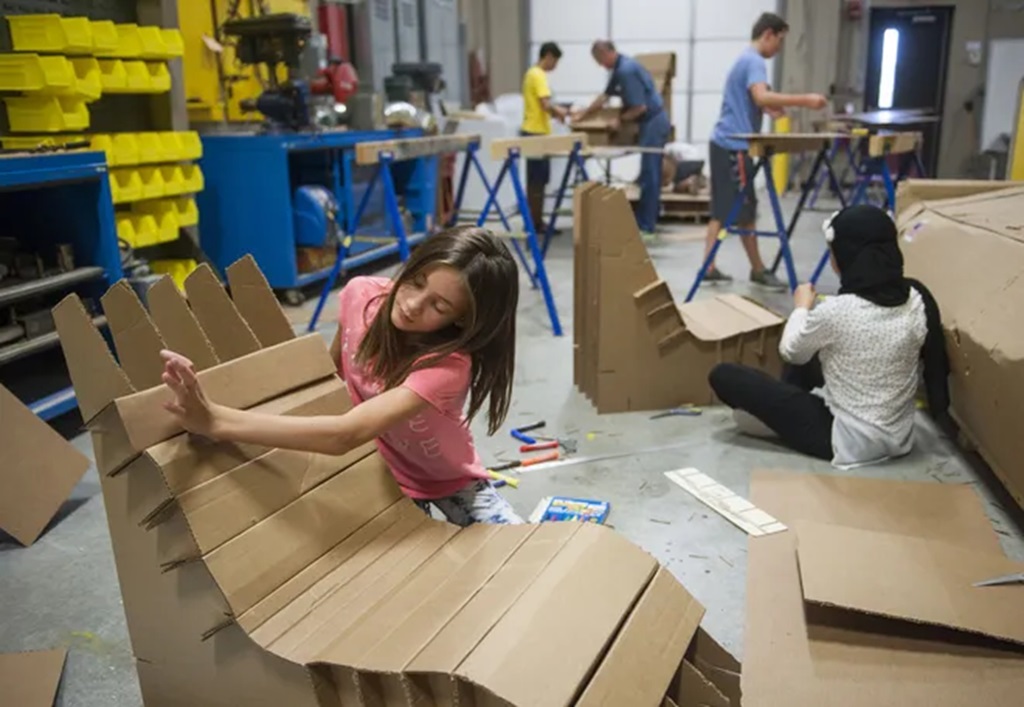
Create Internal Frames
For big projects like furniture and play structures, build an internal metal or wood frame to provide structural strength. Cardboard panels can then be attached to the exterior.
Some framing options:
- Use lightweight wood strips and plywood cut to shape.
- Construct frames from steel rods, bars, or tubes.
- Repurpose wood pallet slats or crates to form the base structure.
- Cut panel frames from cardboard sheets for flatter projects like signs or displays.
Assemble the frame using screws, nuts and bolts, epoxy, brackets, or corner joints. Then adhere the cardboard skin using glue, tape, clamps, or staples.
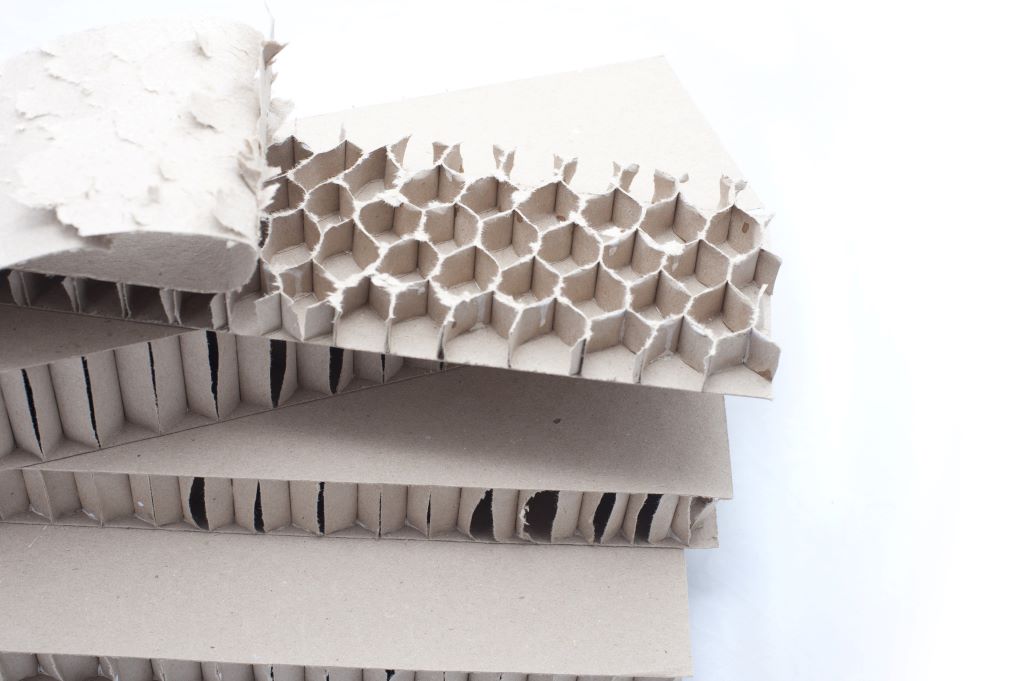
Layer Corrugated Cardboard
Most cardboard boxes use a corrugated construction of layered paper. You can double or triple this corrugated thickness to multiply the strength.
Here are some tips for layering cardboard:
- Glue multiple sheets together using epoxy, white glue, or spray adhesives.
- Tape over the seams between layers with packing, duct tape, or Tyvek tape.
- Cut and laminate thick panels for furniture or large projects.
- Interleave alternating layers of corrugated cardboard running in different directions.
A layered cardboard panel can support hundreds of pounds! Use this for sturdy shelves, workbenches, and other heavy-duty items.
Apply Fiberglass Resin
For the ultimate in strength and weather-resistance, you can infuse cardboard with fiberglass resin. The glass fibers bond with the cardboard to create a super rigid structure.
To treat cardboard with fiberglass resin:
- Cut fiberglass mesh, cloth strips, or mat to size. Polyester resin works too.
- Adhere one side of the fiberglass to the cardboard using epoxy or spray adhesive.
- Mix and apply the fiberglass resin, fully saturating the fibers and cardboard.
- Apply additional layers of fiberglass and resin to build up rigidity.
The resin-infused cardboard becomes rock solid when cured! Use for outdoor signs or other applications.
Choose Strong Cardboard
Not all cardboard is created equal. For heavy-duty projects, select a thicker, denser cardboard material to start with.
Look for cardboard types like:
- Triple wall corrugated boxes – very rigid and sturdy
- Untreated cardboard rather than clay-coated paperboard
- Industrial mat board for flat panels and sheets
- Shipping grade cardboard boxes rated for heavy loads
- Durable kraft-paper material rather than newsprint cardboard
Avoid thin, single layer cardboard from consumer packaging. This is weak and prone to failure. Whenever possible, use thick, multi-layer corrugated cardboard.
Reinforce Specific Cardboard Projects
Here are some examples of ways to reinforce common cardboard items:
Cardboard Furniture
- Use an internal wood or metal frame for support.
- Glue layers of corrugated cardboard together to form panels.
- Brace legs and joints with triangular cardboard pieces.
- Apply epoxy resin or polyurethane for a protective coating.
- Wrap corners and edges in tape for added structure.
Cardboard Playhouses
- Construct an internal framework from PVC pipes or wood.
- Use thick corrugated cardboard bonded with construction adhesive.
- Cut panel frames from cardboard to assemble the house shape.
- Seal seams with outdoor-rated tape.
- Consider fiberglass resin for extreme durability.
Cardboard Shelving
- Layer corrugated cardboard sheets for the shelf surface.
- Install cleats, braces, or battens made from wood or plastic underneath.
- Adhere edging strips along the front edge using L-brackets or corner joints.
- Seal the shelves with polyurethane or epoxy coating.
Cardboard Desks
- Build a robust internal frame from wood, steel, or thick cardboard.
- Cut desk panels from layered cardboard sheets.
- Reinforce undersides with diagonal cardboard webbing for rigidity.
- Use brackets and braces to strengthen legs and attach the top.
- Paint on resin or polyurethane for a durable, smooth surface.
Cardboard Sculptures
- Stuff papier-mache into large cardboard pieces for stability.
- Insert cardboard ribs or tubing into arms, legs, or necks for support.
- Use epoxy resin to fully saturate and strengthen.
- Insert a wire armature if needed for large figures.
- Seal with acrylic paint, polyurethane, or spar varnish.
With the right techniques, you can reinforce cardboard to build nearly anything! Let your creativity run wild.
Tips for Working with Reinforced Cardboard
Follow these tips for best results when strengthening cardboard:
- Use fresh, undamaged cardboard without tears or delamination. Discard any weak spots.
- Apply adhesives to both surfaces and press firmly together for good adhesion.
- Allow all glues and resins to fully cure before stressing the cardboard.
- Smooth any bubbled or warped tape using a bone folder tool.
- Check for and seal any gaps, holes, or openings that compromise strength.
- Start with smaller pieces and test strength before scaling up for large projects.
- For heavy loads, over-engineer with extra layers and abundant reinforcement.
- Avoid getting cardboard wet, as moisture weakens the structure.
With smart reinforcing strategies and quality materials, cardboard can be transformed into a surprisingly strong and versatile material for your wildest creations!
FAQs About Reinforcing Cardboard
What’s the strongest way to reinforce cardboard?
The strongest reinforcement method is to fully saturate cardboard in fiberglass resin. The resin-infused cardboard becomes extremely rigid and durable. Epoxy resin and layered corrugated cardboard also add tremendous strength.
How can I waterproof reinforced cardboard?
Sealing cardboard with epoxy resin, polyurethane, spar varnish, or an oil-based paint will waterproof the surface. Duct tape, packing tape, and Tyvek tape also create a water-resistant barrier. For outdoor use, fiberglass resin works best.
What can I use instead of wood to frame cardboard?
Good alternatives to wood framing include PVC pipes, steel rods, aluminum bars, acrylic tubes, rolled cardboard, and very thick corrugated cardboard. Connect joints with epoxy, brackets, or bolts.
How do you smooth wrinkled tape on cardboard?
Run a bone folder, spoon handle, or other hard object over wrinkled tape to flatten it back down onto the cardboard surface. Heat from a hair dryer softens the adhesive so it adheres smoothly.
How long does reinforced cardboard last?
With quality materials and proper construction, reinforced cardboard can last for many years of regular use indoors. Outdoors, it may only last 1-2 years before replacing due to moisture damage. Fiberglass resin offers the most permanent waterproof structure.
Conclusion
With a bit of ingenuity, cardboard can transform from a flimsy material into a strong, structural building component. Simple adhesives and tapes offer an easy path to reinforcement. For more heavy-duty applications, resin coatings, internal frames, and layering techniques take cardboard to new extremes of rigidity.
Understand the weak points in cardboard and take steps to brace these areas. DIY Christmas decorations: Easy and fun ideas to spruce up your holiday festivities. When crafting your own festive creations, ensure durability by checking for delamination or weak seams that compromise strength. Just like a well-built cardboard creation, these decorations can support amazing loads and endure extended handling, adding a touch of homemade charm to your holiday decor.
So don’t throw out those cardboard boxes and tubes! With the right reinforcements, you can upcycle cardboard into virtually any DIY project. Build the furniture, fort, or sculpture of your dreams with stable, sturdy cardboard. Just add some glue, tape, or resin to transform cardboard from flimsy to firm.